Punch Needle Rug Hooking: Create Your Own Rug Design Template
Meg ☺Alrighty-roo folks, so you've picked up your materials for punch rug hooking, but not sure where to start? Wait, you haven't picked up your materials and don't know what to get?! Oh jeeze. Well, lucky you here's a magical link to Punch Needle Rug Hooking: Getting You Started As Quick As Possible, What Tools Do I Need?
Back? Awesome :•). Let's jump right into this!
Just a quick note; the above link will set you up best in terms of following along with this post. Some ideas may be in reference to things like the thickness of yarn and hoop size! You can definitely still follow along if you have different materials.
#1. Ideation & Initial Sketch

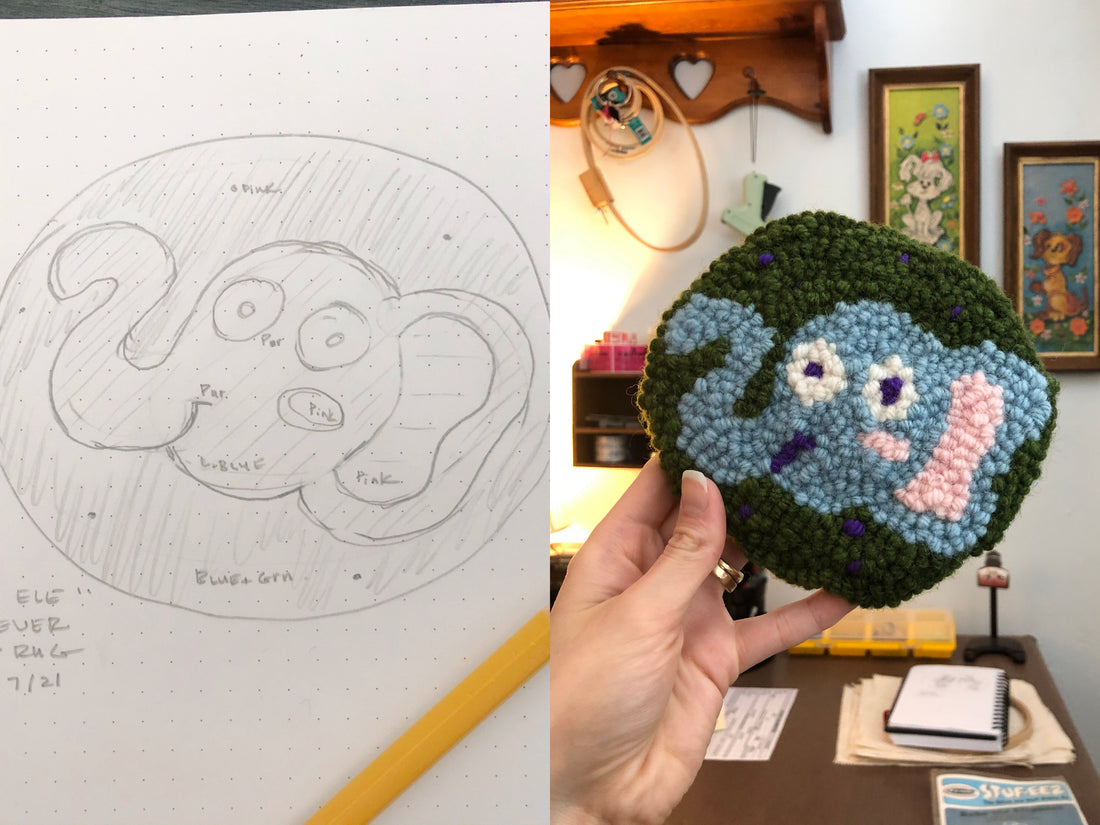
First things first; let's get you an idea! Now here, I want you to concentrate on 2 things: composition & simplicity. Composition simply refers to the arrangement of elements within a work of art. So, how large is your frame or hoop you are working with? In this post, we will be working with a 7" hoop …That's why my second biggy is simplicity... due to the fact that we are working with a small space AND really thick yarn! I'd recommend starting with an animal head or something like a piece of fruit.
Note: When working on punch needle projects, we work (punch) on the back/wrong side of our rug... which results in your image being flipped horizontally on the correct side.
Roughly draw a 7" circle. To achieve an aesthetically pleasing composition, lets keep the illustration as simple as possible and place your drawing right in the middle. Use google images or maybe take a look at your favorites on Etsy or Pinterest for inspiration. Maybe add eyes, nose, and a smile to your apple. If you are having creative block, feel free to reference any of our work over on our Instagram.
Now that you have drawn your subject, check to see if your spacing around the outside of your subject (also known as the negative space) is relatively equal and not too close to our outer reference circle (The closest I'd like to get is within 1/2 inch in this case).
2.Tracing Your Sketch Onto Translucent Paper

Let's grab your initial sketch and a black marker. We are going to need to put your sketch onto something that's translucent (permitting the passing of light) like tracing or rice paper.
Note: You might need to draw over your original sketch with black marker to make tracing it easier. If you don't want to take a marker to your original drawing, you can always take a picture of your drawing, print it out, & then do your black lines on the copy. This is also a good time to flip your image (if need be).
Usually, artists will use what is called a light box (a flat box with a side of translucent glass or plastic; containing an electric light, so as to provide an evenly lighted flat surface or even illumination) for tracing. You may have seen this in an animator's studio or a tattoo artist's shop. If you don't have a light box, don't fret! There are a couple ways you can get around this. 1. The window method: Tape your original sketch to your window and then the tracing paper on top of that. (You may want to do the tracing in pencil first to not risk getting marker on your window). Or 2. The iPad method: Happen to have an iPad hanging around? This works wonderfully as a makeshift light box. Simply pull up a white screen and put a gallon zip baggy over it to protect it from the marker ink potentially seeping through. Now, you can put your initial sketch on top of the iPad & baggy, and then put the tracing paper over that. This works even better than the window method because it doesn't need to be light outside!
3.Tracing Your Translucent Paper Sketch to Monk's Cloth

You might be wondering why we cant just skip tracing our sketch onto tracing paper and go right from original sketch to Monk's cloth. Well, both paper & monk's cloth are closer to opaque, so this makes tracing, sadly, extremely difficult.
Back to it. Put your initial sketch (or copy of) to the side. Repeat the tracing process, but this time, put your tracing paper (the one we just created) down first and then your piece of monk's cloth on top of that.
#4. Choosing Your Yarn Colors


Now it's time to define which color yarn is going where! Keep in mind we are only going to be working with 5 different color yarn, which helps to keep this simple. I just jot colors right onto the sketch. You can always change this (or anything!) later. The biggest thing here is contrast. Contrast is the difference in luminance or color that makes an object distinguishable. This is super important because if you place 2 similar colors or tones next to one another, the design is going to look 'muddy' and you may not even be able to make out what the subject even is! The easiest way to make sure you have good contrast is to simply put the yarns next to one another and cross your eyes a little or squint. Do the colors sorta mesh together? Don't put these yarns right next to one another in your design! Image 1 (above) is an example of bad contrast while image 2 shows good contrast.

I really hope this helped out anyone who was not knowing where to start, scooped up some good advice, or just in a bit of a creative block. Feel free to check out our store for more inspiration or just go ahead & treat yourself :•).
